
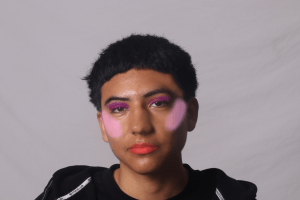
- Start with small adjustments.
- Experiment with different color tones.
- Pay attention to the overall color harmony.
- Use complementary colors.
- And find the right balance.

Up-close, Hand, fingers. ring, texture, shadow, pale, emotion, clear and gold.
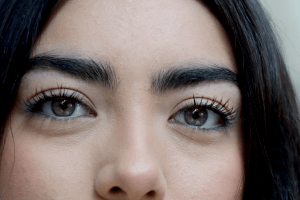
Up-close, brows, nose, nose ring, hair, eyes, mole, brow, lashes, openminded.
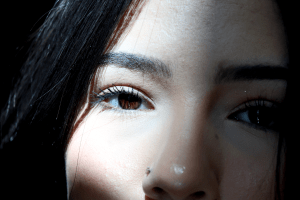
Up-close, eye, green, brown, nose, lashes, eyebrows, black, hair, clear, and emotion.
The photo director for national geographic David griffin. He knows the power of photography to connect us to our world. He talks about glorious images and says who posted them and what the picture has. He discusses how we all use photos to tell our stories. And talks about animal photography.
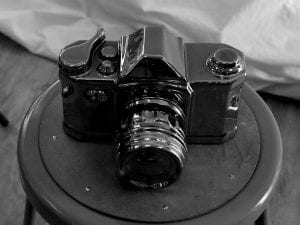
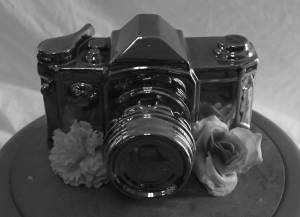
Since the world is in color, it is safe to say that color photography is more realistic and descriptive. A color photo depicts the world as it really is – whereas black and white photos only show a version of reality, one that seems more interpretive and creative. It creates an emotional connection, and it makes you stop, look around, and pay attention. Before digital photography, the only way to work in black and white was to use black and white film. But these days, you have two options: You can shoot in color and convert your photos to black and white in Lightroom, Photoshop, or some other post-processing program or You can switch your camera to its Monochrome mode. Here’s a common reason why photographers shoot in black and white it adds a timelessness to your images.
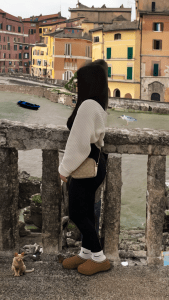
I choose to travel to Venice Italy because I’ve heard it’s really nice. and I want to go to try there food. I also heard they ride in boats to get to places which I find scary but cool. I want to walk around and the nice aquiculture and trees. The three things I added were a cat, boat, and bird.

I choose Mrs. Cauchon as my favorite teacher. I choose her because I really like her class, I enjoy doing the assignments she wants us to do. This class makes me happy, were I can enjoy what I’m doing and look forward to coming everyday. She is a good and respectful teacher. I would say a good photographer as well she has taught me the basics of using a camera. I like how when we turn in the assignments she picks the best ones and share to the class, it leaves me thinking if I would get posted on the blog. I really like how this photograph came out I took a lot but this one was my favorite because its very unique by the mirror and we see her by the mirror instead of just a picture of herself. Overall, the mirror makes the photograph stand out. I liked how the flash made her hair a bright orange color. But overall, Mrs. Cauchon is a great photography teacher.
1-When would you use external flash?
2-Do you need to meter the light if you use flash?
If you are using a flash, getting a light meter that can give you an accurate flashlight reading is essential.
3-What does flash synchronization mean?
flash synchronization or flash sync is the synchronizing the firing of a photographic flash with the opening of the shutter admitting light to photographic film or electronic image sensor.
4-What does ETTL mean?
It means Evaluative through-the-lens and is a type of auto flash exposure system used by Canon. E-TTL
5-What will happen when you shoot faster than the camera sync speed?
By using a shutter speed at or below the camera’s sync speed, the entire sensor is exposed to the flash, resulting in proper exposure. Faster shutter speeds can cause dark bands or underexposed areas in the image.
6-Why do photographers bounce the flash and use a diffuser?
A flash diffuser is used to turn the spotlight sort of illumination to a more spread out environment filling light.
7– What is a slave?
Slave mode is mode that instructs a flash unit to monitor incoming light, and fire when it senses the light produced by another flash unit firing.
8-What should you do if your image comes out too dark or too light?
Too light either the aperture or shutter speed needs to go up. And if there coming out dark you a fill flash.


Fill flash is a photography technique in which the camera flash is deployed to illuminate the darker areas of an image, especially the subject. When the subject is underexposed due to the deficit of sunlight and other lights or sometimes due to the backlight, fill flash is supplemented to correctly expose the subject. A fill flash can even spice up the outdoor photos. With the integration of both natural light and flash, you can bring out the optimal output. The major problem you will encounter while using fill flash is when ambient light is behind the subject. This will result in a silhouette- a dark shape of the image that you will view. In order to derive the best upshot, you can go for a 30% flash and 70% natural light. Don’t hold back to experiment by dialing down the flash as it will let you understand and figure out the correct ratio.
1.Setting the exposure using the histogram the best way to tell if your exposure is correct is by consulting the histogram. Learn how to read it and make the necessary adjustments and until it indicates a proper exposure.
2.RAW Color, contrast and detail are all affected by this compression. To put simpler, shooting in RAW format will give you access to the full capabilities of your camera.
3.Selecting focusing points manually that’s why learning to change the AF points manually is a useful skill. It will improve focusing accuracy and reduce chances of missing important shots.
4.Learn all AF modes AI- Servo AF mode won’t lock the focus and it will constantly refocus. AI focus will automatically from one -shot to Servo if it detects movement in the frame.
5.Aperture Priority This is a great setting for shooting portraits with a blurred background.
6.Shutter Priority fast moving subjects can be shot in this mode, but it’s also very useful for low light situations where you don’t want the shutter speed to be slower than what you can use to shoot hand held.
7.Control motion blur Motion blur often comes from using a shutter speed that is too slow for holding the camera in your hands.
8.Manual White Balance All digital cameras have a few white balance presets.
9.Drive Modes It great for studio work or when shooting anything you have complete control over. CL is great for portraits when you have an expressive model and don’t want to miss any interesting faces.
10.Metering modes There are three metering modes in most cameras, each with a specific job. They have different names depending on camera manufacturer, but essentially they behave the same.
11.ISO Lower values are great when there is plenty of light to work with. Higher ISO values are needed for working in low light.
12.Auto-ISO not fond of any auto setting, but auto ISO will help you when shooting hand held.
13.Exposure compensation It is a +/- scale that will tell your camera to increase or decrease exposure, depending on your needs. It works for all semi-automatic modes (P, Av, TV) and will influence exposure in increments.
14.Manual exposure You can’t call yourself a real photographer until you’ve learned to control every little setting on your camera.